
Four Terminals, One Window
- James Honeycutt

- May 31, 2020
- 4 min read
Default Install
I have finally had a chance to download and install Windows Terminal. What, unfamiliar with Windows Terminal? Windows terminal is a new command line application that allows you to run all your various terminals in one window. As soon as I upgraded my Windows to the 2004 feature update, I was able to download the Windows Terminal from the Microsoft Store. As soon as it was installed, I opened it up to see what was available. For me I had Windows PowerShell (PowerShell v 5), PowerShell Core (PowerShell v 7), Command Prompt, Ubuntu, Debian, and Azure Cloud Shell.
INSERT SCREEN SHOT HERE
I must point out that I already had PowerShell v 7, and WSL (Windows Subsystem for Linux) installed on my daily Windows machine. The default shell on a fresh install of Windows is: Windows PowerShell, Command Prompt and Azure Cloud Shell. I was able to install PowerShell v 7 and Windows terminal automatically picked it up. The only shell that I noticed it did not pickup automatically was Python.


Once you open multiple tabs of different shells, PWSHv7, PWSHv5, CMD, WSL, you will notice they all look the same. Black background, white text. I personally will get confused if I were to keep the default settings like this.


My Customizations
Luckily the developers took this into account. After reviewing Microsoft documentation, I was able to change the color of my text based on the shell I was in. I started by clicking the down arrow and selecting the settings gear/cog. My notepad++ opened a settings.json.
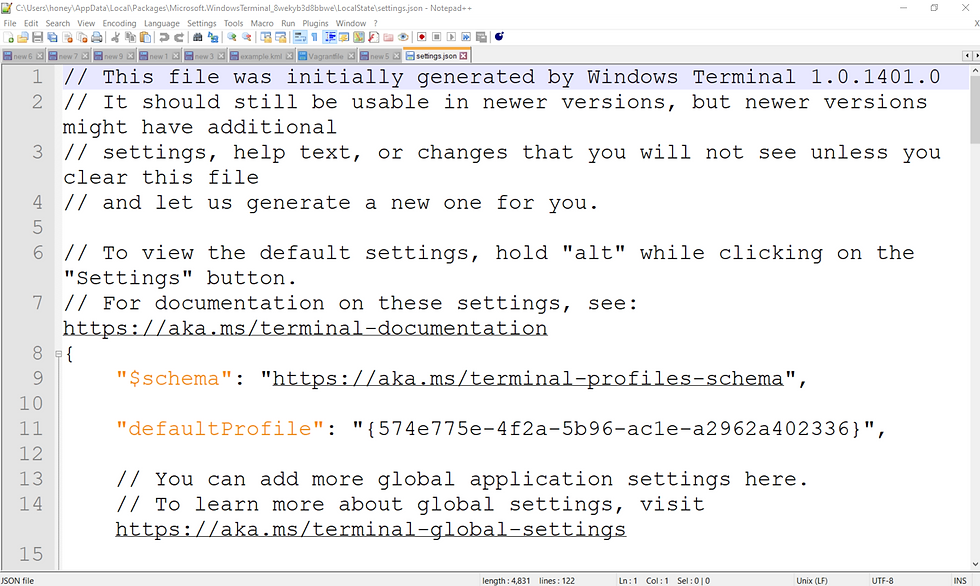
As we can see the file location at the top of the file.
C:\Users\honey\AppData\Local\Packages\Microsoft.WindowsTerminal_8wekyb3d8bbwe\LocalState\settings.json This is great, this means we can use VSCode to open the file and make life easier.
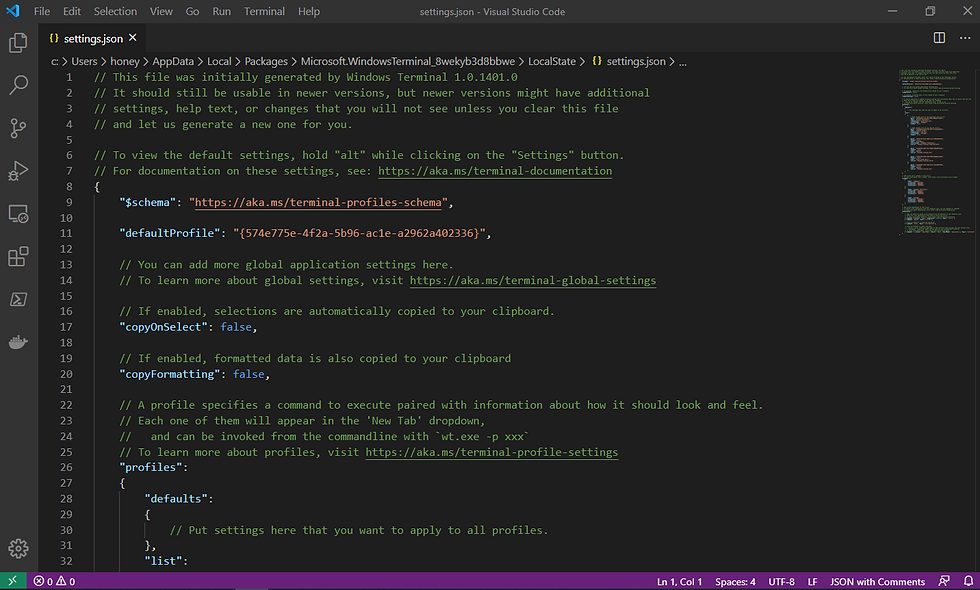
As I scrolled down to look at the file and get familiar with it. I notice there are links for further information. I read "https://aka.ms/terminal-global-settings" to learn about the global settings first. After some playing around I learned that there is a defaults.json located at
C:\Program Files\WindowsApps\Microsoft.WindowsTerminal_1.0.1401.0_x64__8wekyb3d8bbwe\defaults.json. The first thing this says is that "// THIS IS AN AUTO-GENERATED FILE! Changes to this file will be ignored." Ok, so I would be wasting my time if I modified this document, but it wasn't a waste of time reading it. I learned what the default settings were and what the default color schemes where as well.
Great, now that I am a little more familiar with the settings and what can be modified and what cannot lets try to make some changes. I went back to my settings.json file and started looking around and reading again. Under the "Profles" is where I started noticing key:value pairs that could possibly be modified to customize my terminal. I noticed that the "List" contained all my shells and "Schemes" was empty. According to inline documentation "Schemes" is where you would add your custom color schemes. Great, I am pretty positive this is where I need to be to customize my shells. Now I just need to find the correct key:value pair. To find this I clicked the link inside the inline documentation.
After reading that I decided to take a stab at creating my own color scheme, here are the settings I tried.

And here is my results:

Well, that seemed to work the second time I tried it. The first time is fail and I ended up just calling a default scheme from the defaults.json and changing the "background", "foreground", and "cursorColor". Here is what it looks like:

VSCode makes getting your color scheme extremely easy. Once you add any random 3 or 6 hex value for the color, you will have the option to hover over your value and let a color picker pop up.


Comments